Emacs as a C# development environment
Background
At my current job most of our back-end is in .NET framework, and our language of choice is C#. Although Microsoft is moving in the direction of cross platform & open source with .NET core (which all our new projects are using) most of our legacy stuff is still in .NET framework. So as you might imagine everybody runs Windows 10 on their machines and does all of their development in Visual Studio.
My programming background is mostly in Linux and my editor of choice is emacs. So even though I had to use Windows to run the majority of our software that didn’t stop me from using emacs.
Completion
One of the features that immediately attracts people is Visual Studio’s wonderful auto-completion. Especially when encountering a new language having rich auto-complete can really help make a lot of the syntactic elements of coding a lot easier.
Omnisharp is a free and open source server that provides intellisense type auto-completion in a client server architecture. This means that anybody can write a client for Omnisharp’s server and have the same auto-complete experience you’d expect from Visual Studio.

In order to have emacs connect to the omnisharp server we’ll make use of the omnisharp-emacs package. It provides interfaces for quite a few omnisharp features including auto-complete. The auto-complete functionality can be used on it’s own or with a completion framework like company-mode or auto-complete. Personally I use use-package and company so my config looks something like this:
(use-package omnisharp
  :after company
  :config
  (add-hook 'csharp-mode-hook 'omnisharp-mode)
  (add-to-list 'company-backends 'company-omnisharp))
So let’s go line by line: :after company means that we’ll only load omnisharp after company mode has loaded. Everything below :config will be run after the package has loaded. So (add-hook 'csharp-mode-hook 'omnisharp-mode) tells omnisharp mode to start when csharp mode does and then (add-to-list 'company-backends 'company-omnisharp) tells company to use omnisharp as a completion back-end. After the package is installed you’ll need to install the omnisharp server by running M-x omnisharp-install-server.
If you use company mode this is all the config you need it should just work now. If you’re using raw omnisharp you might need some additional configuration since you don’t have anything to trigger the completion other than running M-x omnisharp-auto-complete. A popular way of dealing with this is the following bindings:
(define-key omnisharp-mode-map (kbd ".") 'omnisharp-add-dot-and-auto-complete)
(define-key omnisharp-mode-map (kbd "<C-SPC>") 'omnisharp-auto-complete)
This will trigger the auto-completion whenever you type . or you can trigger it
manually by hitting control space.
Linting
In addition to code completion omnisharp will also lint your code for you. It underlines your errors in red as well as showing an indicator on the left fringe. Placing your point over an error or mousing over it will show more information in the minibuffer or tool-tip respectively.


By default it will use flycheck-mode to enable flycheck automatically in C# buffers you can add a hook to enable it. Like so:
(add-hook 'csharp-mode-hook 'flycheck-mode)
Or if you want to enable flycheck in all of your programming modes you can add:
(add-hook 'prog-mode-hook 'flycheck-mode)
Code Utilities
Omnisharp also provides functions that help with common code actions. A few notable functions are:

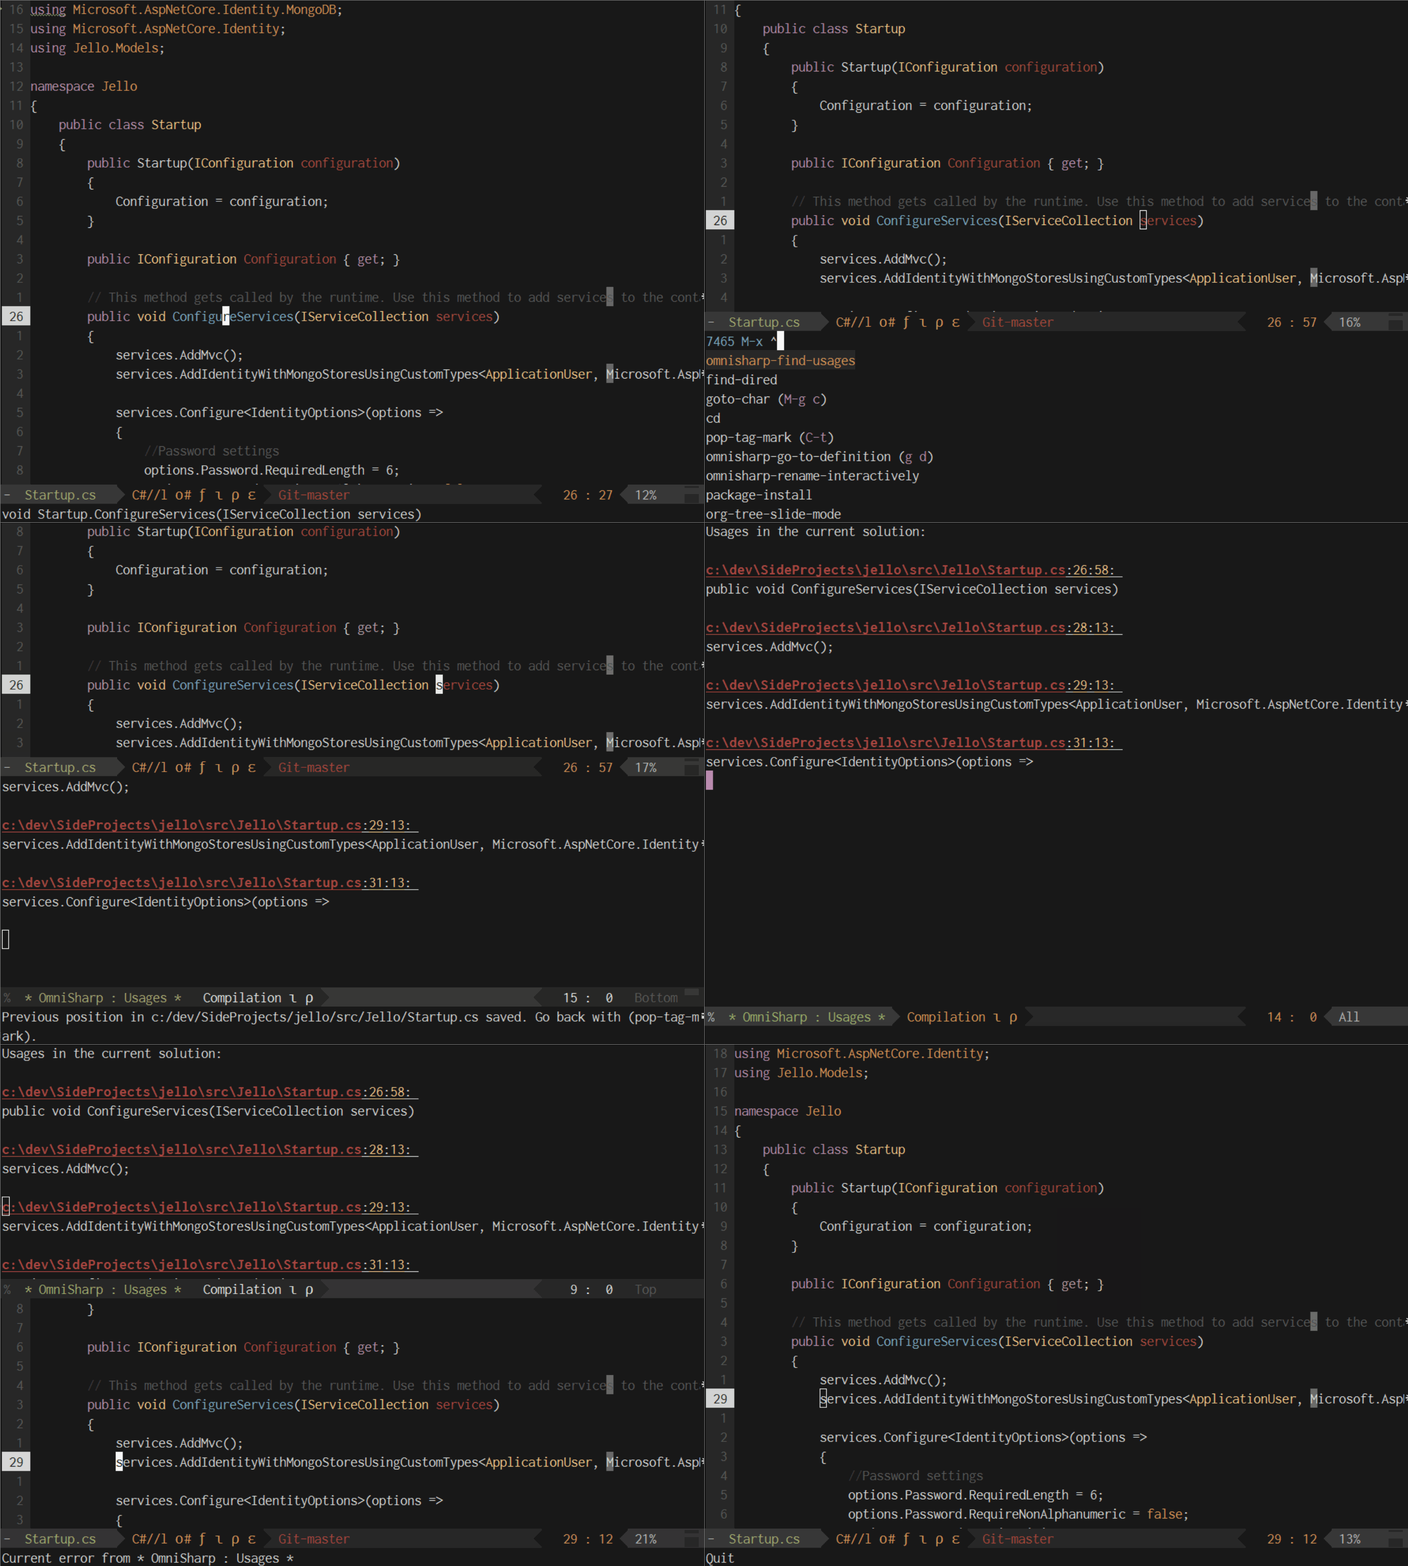
omnisharp-go-to-definition (and also omnisharp-go-to-definition-other-window) are incredibly helpful functions for navigating around a project. PersonallyI prefer other window so I can navigate back quicker.

omnisharp-find-usages is the opposite of go to definition. It allows you to quickly see where something is being used.

omnisharp-rename which allows you to quickly rename the symbol under point. It renames it across all files and references in your solution.

omnisharp-solution-errors will generate a list of errors and warnings across your solution. It also provides links so you can easily navigate to the source of the error.
Snippets
One handy feature that most IDEs provide is file templates and snippets. For example if I create a new class in Visual Studio it will automatically contain a default set of using statements a properly named namespace and class name. By default when we create a new file in emacs it will be empty. This is where snippets come in.
Snippets are a user defined shorthand for quickly inserting boilerplate code. However they are much more powerful than a simple copy and paste, you can define placeholder variables that can quickly be replaced when the template is inserted. It’s easier to show you:

After typing the the shorthand for a snippet you trigger it’s expansion by hitting TAB. Once you’ve expanded the snippet you can cycle throught the available placeholders by pressing TAB again. Starting to type will replace the current placeholder.
The package that provides the functionality is called yasnippet. By default it comes with no snippets. If you don’t want to define them yourself you can also install yasnippet-snippets which comes with a whole load of pre-defined snippets. By default it will load all the snippets in ~/.emacs.d/snippets/. To create a new snippet hit C-c & C-n. It will open a snippet creation buffer for the current mode. You can use C-c C-c to save. Here is the snippet I have for for:
# -*- mode: snippet -*-
# name: for
# key: for
# --
for (int i = 0; i < ${1:max}; i++)
{
    ${2:body;}
}
$0
Key is the shorthand that will be expanded and name can be whatever you want. You define the cursor positions with $1, $2 etc where $0 is the exit position. If you want placeholder text you can use ${1:text} instead. There is a lot more you can do with this including conditionals and running arbitrary elisp. For more information on the syntax check out the docs.
Setup
(use-package yasnippet
  :config
  (yas-global-mode 1))
The installation for yasnippet is very straightforward. After downloading and installing simply use (yas-global-mode 1) to enable it globally. If you only want it in C# mode or programming modes you can use:
(yas-reload-all)
And then one of the following:
(add-hook 'csharp-mode-map 'yas-minor-mode)
(add-hook 'prog-mode-hook 'yas-minor-mode)
Project Management
For project management my go to is projectile. It allows you to keep track of projects (based on git repos) and quickly jump through files, occurrences and buffers. The setup is as simple as:
(use-package projectile
  :config
  (projectile-mode))
That will automatically enable a bunch of key-bindings with the prefix C-c p. In addition to the basic configuration I have a few additional settings set:
(setq projectile-enable-caching t)
(setq projectile-indexing-method 'alien)
(setq projectile-globally-ignored-file-suffixes
      '("#" "~" ".swp" ".o" ".so" ".exe" ".dll" ".elc" ".pyc" ".jar"))
(setq projectile-globally-ignored-directories
      '(".git" "node_modules" "__pycache__" ".vs"))
(setq projectile-globally-ignored-files '("TAGS" "tags" ".DS_Store"))
projectile-enable-caching tells projectile to use a cache for the files in each project. For larger projects this significantly speeds up selection lists and makes the experience a lot snappier. projectile-indexing-method selects whether to use native emacs search or extern programs like find or ag ('alien being external) other than that the settings are reasonably self explanatory.
Projectile has many more features than the ones I listed including running projects and executing tests. I would highly recommend checking out the docs they are very detailed. In addition there are supplementary packages for all of the popular completion frameworks including counsel-projectile, help-projectile and persp-projectile.
Version Control
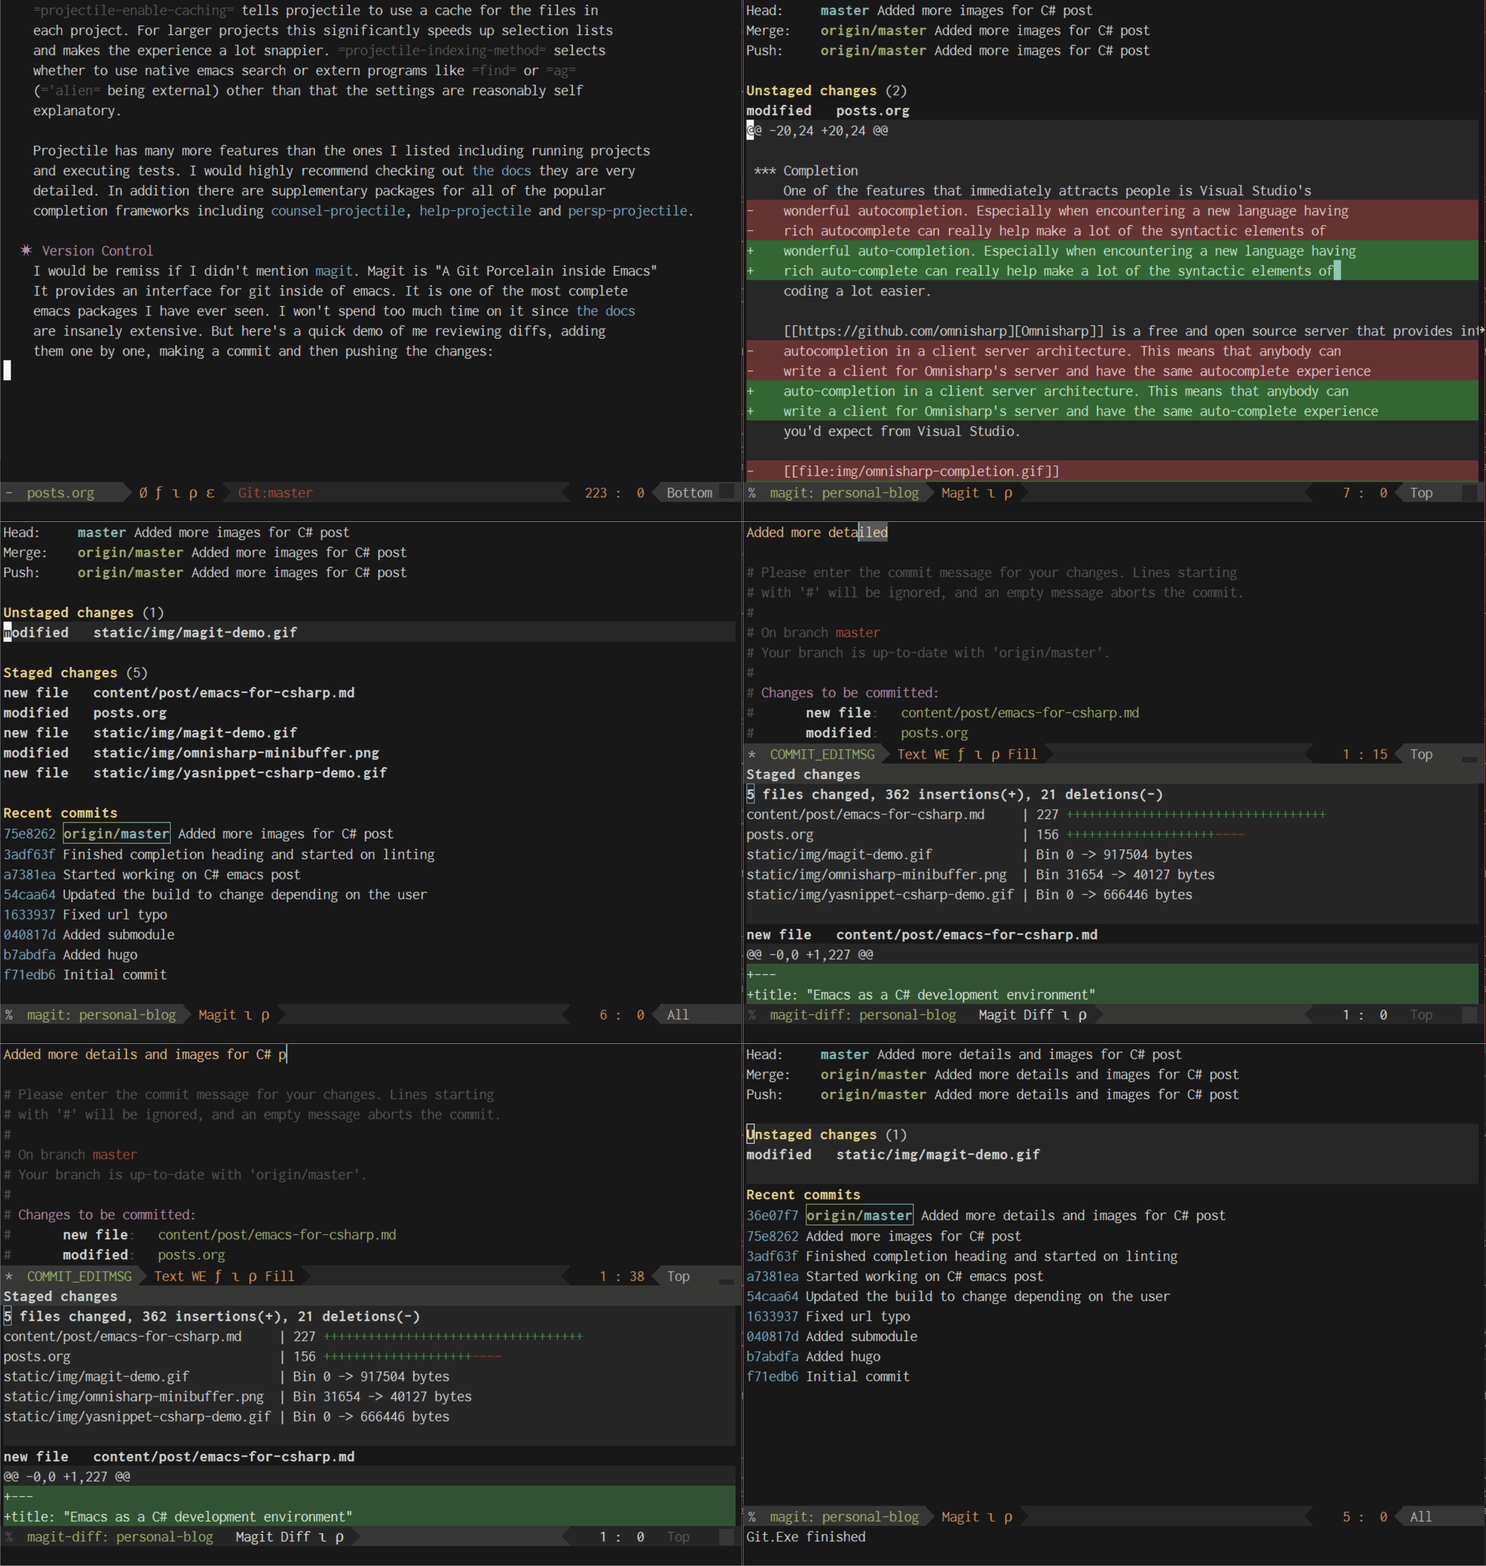
I would be remiss if I didn’t mention magit. Magit is “A Git Porcelain inside Emacs”. It provides an interface for git inside of emacs. It is one of the most completeemacs packages I have ever seen. I won’t spend too much time on it since the docs are insanely extensive. But here’s a quick demo of me reviewing diffs, adding them one by one, making a commit and then pushing the changes:
